New products
home
Arc'teryx -...Highly breathable GORE-TEX fabric gives full weather protection | Adjustable, helmet compatible StormHood provides coverage and full visibility |...
€399.96
Regular price
-20%
€499.95
Price
Offer ends in:
mens-jackets
Arc'teryx -...Highly breathable GORE-TEX fabric gives full weather protection | Adjustable, helmet compatible StormHood provides coverage and full visibility |...
€399.96
Regular price
-20%
€499.95
Price
Offer ends in:
Active filters
training-accessories
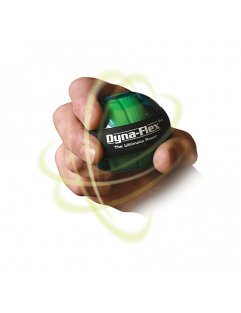
D'Addario - Dynaflex Pro - Climbing TrainingThe D'Addario Dynaflex allows you to achieve the competitive edge no matter what instrument you...
€35.95
Price
single-quickdraws
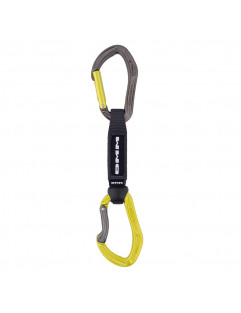
DMM - Alpha Sport - Titanium/Lime - QuickdrawThe Alpha Sport quickdraw gives confident handling and easy clipping. Alpha carabiners have...
€30.95
Price
pulleys-ascenders
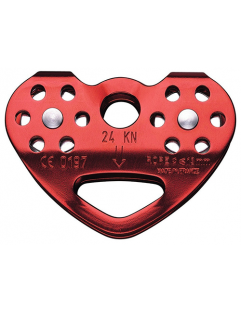
Petzl - Tandem - Climbing PulleyPetzl's double pulley designed for travel along ropes.
The TANDEM is manufactured for smooth...
€51.95
Price
loose-chalk
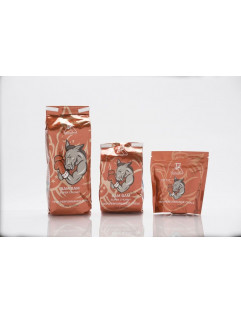
Frictionlabs - Bam Bam - Super Chunky Chalk
Frictionlabs chalk is made for climbers by climbers and is specially designed to help you...
€3.50
Price
loose-chalk
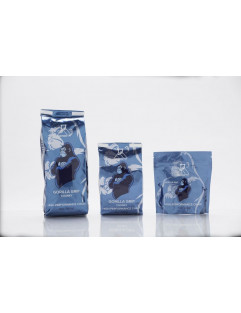
Frictionlabs - Gorilla Grip - Chunky Chalk
Frictionlabs chalk is made for climbers by climbers and is specially designed to help you...
€3.50
Price
loose-chalk
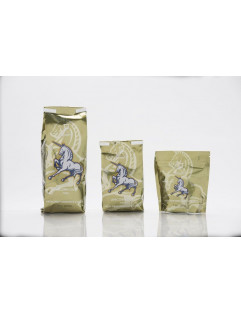
Frictionlabs - Unicorn Dust - Fine Chalk
Frictionlabs chalk is made for climbers by climbers and is specially designed to help you...
€3.50
Price
kids-harnesses
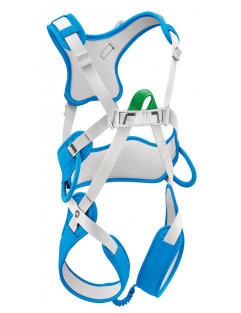
Petzl - Ouistiti - Methyl Blue - Kid's Full-Body Climbing...A full body climbing harness for children less than 30 kg.
Manufactured for kids weighing less...
€64.95
Price
rope-care
Beal - Rope Cleaner - 1 LHow is your rope looking? Need to wash it............With the Beal Rope Cleaner you can wash your...
€9.95
Price
rope-care
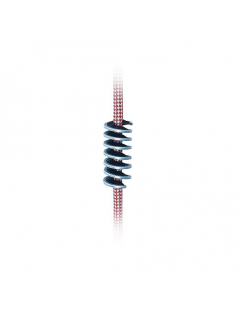
Beal - Rope Brush
A brush specifically created to clean ropes. Adapts easily to different diameters. Twist the...
€21.95
Price
climbing-accessories
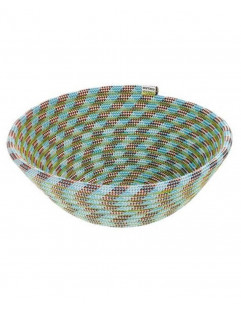
Edelrid - Rope BowlCOMES IN ASSORTED COLORS
Cool accessory by Edelrid, perfect for any household. Key holder, fruit...
€29.95
Price
locking-carabiners
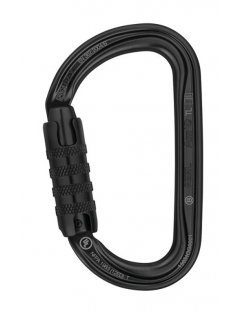
Petzl - Am'D - Black - Climbing CarabinerThe Am’D from Petzl is a lightweight asymmetrical carabiner made of aluminium. Its D shape is...
€25.95
Price
Subcategories
-
Harnesses
<h2 class="page-title"><em><span style="text-decoration:underline;">Harnesses</span></em></h2> <p>The climbing harness is one of the essentials when you look at buying gear for climbing. It adds the necessary safety to your climb for any type of climbing..........sports, indoor, alpine or via ferrata. </p> <p>One big difference in harnesses is the weight of the product and also the comfort. Some are more adjustable than others and some can carry more gear than others. So don't just buy a harness because of the price but rather really look in to what your needs are and what you plan to do with it. </p> <p></p> <p><strong><span style="text-decoration:underline;">Let's have a look at the anatomy of a harness:</span></strong></p> <p><strong><span style="text-decoration:underline;"><img src="https://caspersclimbingshop.com/img/cms/selena2018.jpg" alt="Anatomy of a climbing harness" width="458" height="458" /></span></strong></p> <p>Here we have the classic sports climbing harness (Selena by Petzl). What are the different technical aspects to watch out for?</p> <p><strong><span style="text-decoration:underline;">1. Waist belt:</span></strong></p> <p>Most manufacturers look to provide maximal comfort in this area with minimal weight. Mostly adjustable by 1 or 2 buckles.</p> <p><strong><span style="text-decoration:underline;">2. Belay loop:</span></strong></p> <p>Mostly belay loops are made of super robust nylon. They are the strongest part of a climbing harness and they are the only part that is load tested. Anything hard like the locking carabiner when belaying should be tied to the belay loop whereas things like slings should be avoided as they will make the loop wear off quicker through friction. </p> <p><strong><span style="text-decoration:underline;">3. Gear loop:</span></strong></p> <p>Gear loops are designed to carry equipment (such as quickdraws). Most harnesses have 4 gear loops, but specialized one might have additional loops to carry even more gear. Gear loops are mostly made from plastic and/or webbing. Some harnesses even feature removable plastic gear loops that allow you to personalize it even more. These loops are never intended to be clipped into as a piece of protection at an anchor.</p> <p><strong><span style="text-decoration:underline;">4. Leg loop:</span></strong></p> <p>They are padded for comfort and sometimes feature buckles to be able to adjust them depending on clothing choice. They are made from a variety of materials.</p> <p><strong><span style="text-decoration:underline;">5. Cross-Piece:</span></strong></p> <p>This webbing connects the two leg loops to the front of the harness. The cross piece is adjustable and you can move the small buckle until you get the right fit.</p> <p><strong><span style="text-decoration:underline;">6. Tie-in loops:</span></strong></p> <p>They connect to the belay loop and are not strength tested, yet independent studies show that they can withstand 12-14 kN before breaking. Any cord, rope or webbing should be attached through both the lower and upper tie–in points to properly distribute the wear. <em>Do <span class="p2">not</span> belay or rappel with your carabiner attached through the 2 tie–in points—this weakens the strength of the carabiner; use the belay loop instead.</em></p> <p><strong><span style="text-decoration:underline;">7. Buckle</span></strong></p> <p><span>They consist of 2 pieces of metal and are mostly a bit off–centre to avoid conflict with rope tie–in. A harness must have a buckle for the waist belt but does not necessarily need buckles on the leg loops.</span></p> <p><strong><span style="text-decoration:underline;">8. Haul loop:</span></strong></p> <p><span>Located on the back of the harness, this loop of stitched webbing is used to attach a second rope or haul line. </span><span class="p2">Warning:</span><span> It’s not intended to be load bearing or clipped into for a piece of protection.</span></p> <p></p> <p><span style="text-decoration:underline;"><strong>Types of harnesses</strong></span></p> <p>There are different types of harnesses for the different types of climbing out there. Harnesses come from lots of brands. Some are better for sport climbing, some for alpine climbing and some for traditional climbing, so not every harness is the same.</p> <div class="text parbase section"> <div class="mb10"> <p><span class="p2"><span style="text-decoration:underline;">Sport or gym harnesses</span>: </span>Stripped down for fast, ultralight travel, whether indoors in the gym or on outdoor sport routes.</p> <p><span style="text-decoration:underline;">Typical features:</span></p> </div> </div> <div class="text parbase section"> <div class="mb10"> <ul> <li><span class="p2">Single automatic or double–back waist belt buckle: </span>Quick and easy to get on and off.</li> <li><span class="p2">2 gear loops:</span> since minimal gear is needed.</li> <li><span class="p2">Thin belay loop: makes it lighter</span></li> <li><span class="p2">Minimal leg adjustability: sometimes none at all to minimize weight,</span> instead they use material that will stretch and give.</li> </ul> <div class="text parbase section"> <div class="mb10"> <p><span class="p2"><span style="text-decoration:underline;">Traditional (trad) harnesses</span>: A</span> trad harness maximizes space since a lot more gear is required than in sports climbing, while being relatively light and comfortable.</p> <p><span style="text-decoration:underline;">Typical features:</span></p> </div> </div> <div class="text parbase section"> <div class="mb10"> <ul> <li><span class="p2">Adjustable leg loops with buckles</span></li> <li><span class="p2">4 or more gear loops: for </span>lots of gear.</li> <li><span class="p2">Thick and durable padding: </span>Increases comfort when spending a long time in the harness </li> <li><span class="p2">Extra lumbar padding: </span>to stabilize the lower back and waist.</li> <li><span class="p2">Haul loop: </span>For carrying up a second rope</li> </ul> <div class="text parbase section"> <div class="mb10"> <p><span class="p2"><span style="text-decoration:underline;">Ice and mixed harnesses</span>: Like the</span> trad harnesses but designed to cope with winter conditions.</p> <p><span style="text-decoration:underline;">Typical features</span>:</p> </div> </div> <div class="text parbase section"> <div class="mb10"> <ul> <li><span class="p2">Adjustable leg loops using buckles:</span> Fully adjustable to fit over winter clothing.</li> <li><span class="p2">4 or more gear loops: for lots of gear like ice axe</span></li> <li><span class="p2">Extra lumbar padding: </span>to stabilize the lower back and waist.</li> <li><span class="p2">Haul loop: </span>For carrying up a second rope</li> </ul> </div> </div> </div> </div> </div> </div> <div class="text parbase section"> <div class="mb10"> <p><span class="p2"><span style="text-decoration:underline;">Alpine/mountaineering harnesses</span>: </span>Lightweight, adjustable leg loops for easy on and off.</p> <p><span style="text-decoration:underline;">Typical features:</span></p> </div> </div> <div class="text parbase section"> <div class="mb10"> <ul> <li><span class="p2">Fully adjustable leg loops and waist belt</span></li> <li><span class="p2">4 or fewer gear loops</span></li> <li><span class="p2">Thin material: </span>Thin material allows for a smaller and more compact harness that might not necessarily be worn the entire day.</li> <li><span class="p2">Thin belay loop: </span>Saves weight</li> <li><span class="p2">Haul loop: </span>For carrying up a second rope.</li> </ul> <p></p> <div class="text parbase section"> <div class="mb10"> <p><span style="text-decoration:underline;"><strong>Women's Harnesses</strong></span></p> <p>You have specific harnesses for women and kids which are ergonomically right designed for their needs. </p> </div> </div> <div class="text parbase section"> <div class="mb10"> <p>Women–specific aspects include:</p> </div> </div> <div class="text parbase section"> <div class="mb10"> <ul> <li>Shaped waist belt.</li> <li>Increased rise.</li> <li>Reduction in the leg–to–waist ratio.</li> </ul> <p></p> <div class="text parbase section"> <div class="mb10"> <p><span style="text-decoration:underline;"><strong>Kid's Harnesses</strong></span></p> </div> </div> <div class="text parbase section"> <div class="mb10"> <p>A kids harness generally shares many features with that of an adult, the only difference is that they are build to accommodate a child’s physique.</p> </div> </div> <div class="text parbase section"> <div class="mb10"> <p>Young children, usually 5 years and under, have a relatively high centre of gravity (larger head–to–torso ratio) and should be equipped with a <span class="p2">full–body harness</span>. This type of harness is considered a type B harness and is designed for weights up to 40Kg (88 lbs.). A sit harness is recommended once the kid's centre of gravity lowers.</p> <p></p> <div class="text parbase section"> <div class="mb10"> <h2><span style="text-decoration:underline;">How to Fit and Test a Climbing Harness</span></h2> <p><span style="text-decoration:underline;"><strong>Fit:</strong></span></p> <ol> <li>Loosen the straps for leg loops and waist loop.</li> <li>Step into the harness. Make sure none of the leg/belay loops are twisted or crossing. The belay loop should face the front of the harness.</li> <li>Pull the waist belt just above your hip (belly button height) to ensure that you will not accidentally slip out of the harness in the event you fall upside down. </li> <li>Adjust the leg loops, if possible. Some harnesses do not have adjustable leg loops and use a piece of elastic to allow the leg loop to stretch.</li> <li>The placement of leg loops is not as important as the placement of the waist belt; it is based more on comfort.</li> <li>Tighter leg loops give the climber more comfortable when hanging freely, although range of movement can be restricted. On the other hand,, loos leg loops provide more mobility but are not as comfortable to dead–hang in. In any case the harness is safe, so everyone must make the personal call on comfort.</li> <li>Finally, make sure the buckles on each loop are doubled back. You are now ready to test your harness.</li> </ol> <p><span style="text-decoration:underline;"><strong>Test:</strong></span></p> <ol> <li>A harness can only be tested when hanging in it. <span>When the harness is weighted, it should feel relatively comfortable and be easy to sit upright (like a chair).</span></li> <li><span>There shouldn't be any points of pressure where the there's a feeling of the harness digging in the skin.</span></li> <li><span><span>The waist belt should feel comfortable and not move around too much.You can also test for shifting by trying to pull the waist belt down over the hips. You should not be able to.</span> </span></li> </ol> <p></p> <p><span style="text-decoration:underline;"><strong>Harness standards:</strong></span></p> <div class="text parbase section"> <div class="mb10"> <p>All harnesses must be submitted for stringent testing to satisfy the <em>Union Internationale des Associations d’Alpinisme (UIAA 105)</em> or the European Committee for Standardization (EN 1277). Both of these are independent testing groups that help ensure quality standards among a variety of products.</p> </div> </div> <div class="text parbase section"> <div class="mb10"> <p>Harnesses are categorized and defined by their shape and use. All climbing harnesses that consist of a waistbelt and 2 leg loops are classified as a Type C sit harness. On a Type C sit harness, the belay loop is tested to 15kN. A full–body harness that is child–specific is considered a Type B small–body harness and is designed for weights ≤ 40 Kg (≤ 88 lbs.). A Type B small–body harness’ tie–in points must be rated to a minimum of 10kN (2,240 lbs.).</p> </div> </div> <p></p> <p></p> <p></p> </div> </div> </div> </div> </div> </div> </div> </div> <p>The choices are endless and difficult today so contact our <a href="/contact-us">Customer Service</a> or <a href="mailto:info@caspersclimbingshop.com">send us a mail</a> to help you choose the right product for your needs. </p> <p></p> <p>Shop online.........more time to climb.</p> <p></p> <p>Casper's Supports Your Summit</p> -
Quickdraws
<h1 class="cdr-my-space-one-x cdr-text cdr-text--heading-serif-800@xs cdr-text--heading-serif-strong-900">How to Choose Quickdraws</h1> <p>When you are out shopping for quickdraws there are several things to look out for. The three basic questions you need to ask yourself are first of all, how many quickdraws do I need? Second, ask yourself what gate opening you need/prefer. And finally you need to decide on the length of the sling. More advanced climbers know that there is a bit more to it, like carabiner size&shape or sling material&width and of course weight strength ratio but let's stick to the first 3 for now. </p> <h2>How many quickdraws do I need?</h2> <p>That depends entirely on the length of the route you are climbing and wether it is quiet straight or not. Furthermore, when a guidebook lists the number of bolts on a route, that’s also your quickdraw total but you always want 1 or 2 extra just in case. And consider that if you use quickdraws to build your anchor you'll need those extra to the bolts.</p> <table width="406" style="height:106px;"> <tbody> <tr> <td>average sport route (15m)</td> <td>12 quickdraws</td> </tr> <tr> <td>longer sport routes (30m)</td> <td>16-18 quickdraws</td> </tr> <tr> <td>sport routes 35m+</td> <td>24+ quickdraws</td> </tr> <tr> <td>Routes requiring a 70m rope or longer</td> <td>12+ quickdraws</td> </tr> </tbody> </table> <p></p> <h2>What gate opening do I need?</h2> <p>The 3 main gate openings on quickdraws are:</p> <p><img src="https://caspersclimbingshop.com/img/cms/gate%20straight.jpg" alt="Straight Gate" width="143" height="183" /> - straight gate: solid straight gates that are easy to operate</p> <p><img src="https://caspersclimbingshop.com/img/cms/bent%20gate.jpg" alt="Bent Gate" width="150" height="172" /> - <a href="https://www.caspersclimbingshop.com/quickdraws/332-spirit.html" target="_blank" rel="noreferrer noopener">bent gate</a>: concave gate that makes clipping a rope quick and easy</p> <p><img src="https://caspersclimbingshop.com/img/cms/wire%20gate.jpg" alt="wire gate" width="122" height="159" /> - <a href="https://www.caspersclimbingshop.com/carabiners/2302-hoodwire.html" target="_blank" rel="noreferrer noopener">wire gate</a>: loop of stainless-steel wire for a gate decreasing overall weight </p> <p></p> <p>Also watch out for the <span style="text-decoration:underline;"><strong>keylock</strong> <strong>system</strong></span>, a system which keeps the carabiner from hooking and catching on your harness gear loop and other annoying places, by giving it a smooth notch at the point where gate and carabiner interact. </p> <p><img src="https://caspersclimbingshop.com/img/cms/keylock.jpg" alt="keylock" width="130" height="147" /> it can be found on some straight&bent gate openings. You will most likely pay a little extra for this but it's worth it.</p> <p><img src="https://caspersclimbingshop.com/img/cms/nonkeylock.jpg" alt="non keylock" width="134" height="118" /> Wire gate are always non keylock quickdraws.</p> <p></p> <h2>What sling length do I need?</h2> <p>Another thing climbers consider when buying quickdraws is the length of the sling. Sport climbers tend to buy pre-made slings whereas alpinists tend to compose them themselves. Short slings are light but long slings are good at reducing drag.</p> <p>When the route is pretty straight it is best to use shorter slings for reduced weight, between 10-12 cm. </p> <p>When the route is not traveling in a straight path and/or more than 12 quickdraws are required, climbers tend to choose a sling between 17 and 18 cm long. </p> <p>In general for sports climbing it is beneficial to have a variety of lengths with you because the route might develop differently than planned.</p> <p>Trad climbers usually build their own quickdraws by taking a 60cm or longer sewn sling and clipping two carabiners of choice to the sling.</p> <p></p> <h2>What else do experienced climbers look for in quickdraws?</h2> <ul> <li>carabiner size - the smaller, the lighter but also more difficult to clip</li> <li>carabiner shape - affects the ease of use depending on hand size</li> <li>carabiner gate open clearance - affects the ease of use, too small can cause fingers to get stuck while too big can complicate clipping</li> <li>overall weight - saving weight can give you an advantage on long climbs</li> <li>sling material - depending on material, different weight</li> <li>sling width - Skinnier slings are lighter, but they also tend to be a bit harder to handle than a wider sling. Also affects overall weight</li> <li>carabiner strength - the stronger, the better. Consider everything else first and then choose the strongest carabiner that fits.</li> </ul> <p></p> <p>The choices are endless and difficult today so contact our <a href="/contact-us">Customer Service</a> or <a href="mailto:info@caspersclimbingshop.com">send us a mail</a> to help you choose the right product for your needs. </p> <p></p> <p>Shop online.........more time to climb.</p> <p></p> <p>Casper's Supports Your Summit</p> -
Carabiners
<h1 class="cdr-my-space-one-x cdr-text cdr-text--heading-serif-800@xs cdr-text--heading-serif-strong-900">How to Choose Carabiners</h1> <p>Just like with quickdraws, there are certain things to consider when shopping for carbiners. Different tasks require different tools and the three main categories to consider would be the shape, gate opening and weight/strength.</p> <p></p> <table width="808" style="height:57px;"> <tbody> <tr> <td style="text-align:center;">Shape</td> <td style="text-align:center;">Pro</td> <td style="text-align:center;">Con</td> </tr> <tr> <td><a href="https://www.caspersclimbingshop.com/carabiners/907-smd2017.html" target="_blank" rel="noreferrer noopener">D shape carabiner</a></td> <td> <p>Strongest shape</p> <p>Larger gate opening than Oval Shape</p> </td> <td> <p>Smaller gate opening than Asymmetric D</p> <p>Heavier than Asymmetric D</p> <p>More expensive than Oval Shape</p> </td> </tr> <tr> <td><a href="https://www.caspersclimbingshop.com/carabiners/271-amd2016.html" target="_blank" rel="noreferrer noopener">Asymmetric D Carabiner</a></td> <td> <p>Large gate opening</p> <p>Strong and light</p> </td> <td> <p>More expensive </p> <p>Not as strong as D Shape</p> </td> </tr> <tr> <td><a href="https://www.caspersclimbingshop.com/carabiners/51-attache.html" target="_blank" rel="noreferrer noopener">Pear Shape</a></td> <td> <p>Large gate opening</p> <p>Designed for belaying and rappelling </p> </td> <td> <p>Heavier and more expensive than most other carabiners</p> <p>Not as strong as D & Asymmetric D shape</p> </td> </tr> <tr> <td><a href="https://www.caspersclimbingshop.com/carabiners/866-okcarabiner.html" target="_blank" rel="noreferrer noopener">Oval Shape</a></td> <td> <p>Limits load shifting</p> <p>Can hold more gear than D Shape</p> </td> <td> <p>Not as strong as other shapes</p> <p>Smaller gate opening than other shapes</p> <p>Heavier than other shapes</p> </td> </tr> </tbody> </table> <p></p> <p>The Gate openings are the same here as they were with the quickdraws. Main categories to look out for are straight, bend or wiregate carabiners. </p> <table width="387" style="height:80px;"> <tbody> <tr> <td>gate opening</td> <td>pro</td> <td>con</td> </tr> <tr> <td>straight</td> <td> <p>durable and easy to use</p> <p>available with keylock system</p> </td> <td>heavier than wiregate</td> </tr> <tr> <td>bent</td> <td> <p>clipping rope is easier</p> <p>durable</p> <p>available with keylock system</p> </td> <td>heavier than wiregate</td> </tr> <tr> <td>wire </td> <td> <p>lightweight</p> <p>reduce gate lash</p> <p>less likely to freeze shut</p> </td> <td>less durable than straight&bent gate</td> </tr> </tbody> </table> <div class="cdr-mb-space-one-x cdr-rating_5.2.0 cdr-rating--small_5.2.0"></div> <div class="cdr-mb-space-one-x cdr-rating_5.2.0 cdr-rating--small_5.2.0"> <div class="cdr-rating__ratings_5.2.0"> <h2><b>Carabiner Size, Weight and Strength</b></h2> <p><b>SIZE: </b>Carabiners exist in lots of different sizes, the bigger they are the easier it is to clip because the opening is generally bigger. Smaller carabiners have the advantage of being lighter.</p> <p><strong>Weight: </strong>Generally the lighter the carabiner the better because you want to minimise the load you have to carry up the route/mountain. But as previously mentioned, light carabiners are usually smaller and harder to handle.</p> <p><strong>Strength: </strong>Carabiners are rated for strength in three directions: lengthwise (major axis), sideways (minor axis) and while open (major axis open or "gate open").</p> <h2>Which <b>Carabiner To Use</b></h2> <p>First think about what you will be using the carabiner for. Now that you know about the technical aspects of the carabiner it is time to choose one that fits your needs. This might help:</p> <table width="404" style="height:126px;"> <tbody> <tr> <td> <table border="0" cellpadding="0" cellspacing="0" class="table table-striped"> <tbody> <tr> <td valign="top" width="221"> <p>Belaying and rappelling</p> </td> <td valign="top" width="221">pear-shape locking carabiner</td> </tr> </tbody> </table> </td> <td></td> </tr> <tr> <td> <table border="0" cellpadding="0" cellspacing="0" class="table table-striped"> <tbody> <tr> <td valign="top" width="221"> <p>Sport-climbing quickdraws</p> </td> <td valign="top" width="221"> <table border="0" cellpadding="0" cellspacing="0" class="table table-striped"> <tbody> <tr> <td valign="top" width="221"> <p>Asymmetric D carabiners with straight gates, bent gates and/or wiregates</p> </td> </tr> <tr> <td valign="top" width="221"></td> </tr> </tbody> </table> </td> </tr> </tbody> </table> </td> <td></td> </tr> <tr> <td> <table border="0" cellpadding="0" cellspacing="0" class="table table-striped"> <tbody> <tr> <td valign="top" width="221"> <p>Trad-climbing quickdraws</p> </td> <td valign="top" width="221"> <table border="0" cellpadding="0" cellspacing="0" class="table table-striped"> <tbody> <tr> <td valign="top" width="221"> <p>Asymmetric D carabiners with wiregates</p> </td> </tr> <tr> <td valign="top" width="221"></td> </tr> </tbody> </table> </td> </tr> </tbody> </table> </td> <td></td> </tr> <tr> <td style="background-color:#ffffff;"></td> </tr> </tbody> </table> <p></p> <p></p> <p>The choices are endless and difficult today so ideally come down to Casper's Climbing shop to get a feel for this gear and get some more advice. Also, you can contact our <a href="/contact-us">Customer Service</a> or <a href="mailto:info@caspersclimbingshop.com">send us a mail</a> to help you choose the right product for your needs. </p> <p></p> <p>Shop online.........more time to climb.</p> <p></p> <p>Casper's Supports Your Summit</p> </div> </div> -
Ropes
<h2 class="cdr-my-space-one-x cdr-text cdr-text--heading-serif-800@xs cdr-text--heading-serif-strong-900">How to choose a climbing rope?</h2> <p>When going out to by a climbing rope there are four main features to consider:</p> <p>- What type of rope do you need?</p> <p>- What diameter and length should the rope have?</p> <p>- What features should the rope provide?</p> <p>- What safety certification should the rope have?</p> <p></p> <p>All of these entirely depend on what you need the rope for? Are you going mountaineering? Indoor climbing? Multi-pitch? Etc.</p> <h3><span style="text-decoration:underline;">Type of rope</span></h3> <p>There are three main differences in rope types designed for climbing: single, half, and twin ropes. Furthermore, a difference is made between static and dynamic ropes. In climbing, static ropes are only used when lowering an injured climber or ascending a rope. They are not designed, certified or tested to climb on because they stretch very little, that's what dynamic ropes are made for. </p> <p><strong>Single Ropes:</strong></p> <p>Most people tend to buy single ropes because they come in many different diameters and lengths, making them super versatile in their use. A single rope is a rope that is not to be used in combination with any other rope but by itself, like the name suggests. <span>It's important to only use a rope as it was designed and tested to be used. Some single ropes can be used as twin or half rope too if this is specified by the manufacturer. </span></p> <p>Single ropes are marked with a circled 1 on each end of the rope.</p> <p>Single ropes, like previously mentioned are very versatile, and tend to be best for trad climbing, sport climbing, big-wall climbing and top roping.</p> <p><strong>Half Ropes:</strong></p> <p>When using half ropes, you climb with two ropes. As you ascend, clip one rope to protection on the left and the other to protection on the right. This allows the ropes to run parallel and straight, thereby reducing rope drag on wandering routes. Half ropes are ideal for trad climbing on wandering multi-pitch rock routes, mountaineering and ice climbing. They do have their positive and negative sides. What is good about them is the reduced rope drag on wandering routes; two ropes can rappelle further than 1 rope; if one rope gets damaged you still have a second one. The downside to this style is first of all more weight, since you are carrying two ropes; and the handling of 2 half ropes is harder than that of a single rope. It's important to only use a rope the way it was designed and tested to be used.</p> <p>Half ropes are marked with a circled ½ symbol on each end.</p> <p>Half ropes are best for trad climbing on wandering multi-pitch rock routes, mountaineering and ice climbing.</p> <h4><b>Twin Ropes</b>:</h4> <p><span>Just like half ropes, twin ropes require a two-rope system. Twin ropes however have more drag due to the fact that you always have to clip both strands through each piece of protection, just like you would on a single rope. This component makes the twin-rope system ideal for non-wondering routes. Furthermore, compared to half ropes, twin ropes tend to be lighter because they are a bit thinner. As for the advantages and disadvantages of this system compared to a single rope they are the same as for a half rope. On one hand, two ropes can rappelle further than 1 rope and if one rope gets damaged you still have a second one. On the other hand, two ropes are heavier than one and working with two ropes is more complicated than with one. <span>Just as with half ropes, twin ropes are designed and tested only for use as a matching pair; don’t mix sizes or brands. </span></span></p> <div class="text parbase section"> <div class="mb10"> <p>Twin ropes have a circled infinity symbol (∞) on each end.</p> <p>Twin ropes are best for trad climbing on non-wandering multi-pitch rock routes, mountaineering and ice climbing.</p> <h4><b>Static Ropes:</b><b></b></h4> <p>They are not meant for sports climbing but rather for rescue work, caving, climbing fixed lines with ascenders and hauling loads. Static ropes are amazing when you are in a situation where you do not want the rope to stretch, like when injured climber needs to be lowered, hauling equipment up wit a rope or when ascending a rope. </p> <h3><span style="text-decoration:underline;">Climbing rope diameter:</span></h3> <p>The rope diameter of a rope can vary quiet a bit and can make a huge difference on your climbing experience. Thinner ropes for example have the advantage of being lighter than thicker ropes but at the same time they are not as robust and need more skill when belaying with them. So depending on wether you are top roping in your local gym/crag or going for long distance multi-pitches you'll want something completely different.</p> <p><strong>Static ropes </strong>have a diameter of about 9-13 mm. </p> <p><strong>Half ropes </strong>have a diameter of about 8-9 mm.</p> <p><strong>Twin ropes </strong>have a diameter of about 7-8 mm.</p> <p><strong>Single ropes </strong>have more uses to them so the sizes vary a bit more:</p> <blockquote> <p><em>up to 9.4 mm </em>are ideal for long multi-pitches due to their reduced weight.</p> <p><em>9.5 - 9.9 mm </em>are good allrounders, they are light enough for a trip to the mountains and yet robust enough for repeated indoor use</p> <p><em>10 mm and above </em>are ideal to use in the gym, when figuring out the moves and making repeated falls</p> </blockquote> <h3><span style="text-decoration:underline;">Rope length:</span></h3> <p>In sports climbing the average rope length is about 60m but the range goes from 30m-80m for a single rope. The only thing you need to "watch out" for is that the rope is at least twice as long as the route you are attempting because you obviously have to get back down. Generally indoor ropes are no longer than 40m since the routes are generally quiet short (15m) compared to outdoor routes (30m) where you could need up to 80m.</p> <p></p> <h3><span style="text-decoration:underline;">Rope features:</span></h3> <p>When comparing ropes these are some features to look for:</p> <ul> <li><strong>Dry treatment </strong>is designed to reduce the ropes water <span>absorption</span>. While a rope is wet it becomes less resistant to falls, and if it should freeze, the rope becomes very hard to handle. Dry treatment is important should you plan on ice climbing for example. </li> <li><strong>Middle Mark </strong>is a black dye mark half way of the rope to indicate that you have half of the length left.</li> <li><strong>End warning marks </strong>are shown on some ropes when approaching the end of the rope</li> </ul> <p></p> <h3><span style="text-decoration:underline;">Safety:</span></h3> <p><span>The Union Internationale des Associations d'Alpinisme</span><i> </i><span>(UIAA) is the international mountaineering and climbing federation that creates safety standards to which all climbing ropes must adhere. These are the criteria that make a climbing rope fit for sports use.</span></p> <p><span>The <strong>Fall rating </strong>is determined to identify how many falls a rope can take before failing. This is being determined differently for different rope types. <span>All single ropes and half ropes must withstand a minimum of 5 UIAA falls. Twin ropes must withstand a minimum of 12 UIAA falls. This might not seem like a lot but the falls in the tests are much greater than in actual climbing. </span></span></p> <p><span><span><span><strong>Static elongation</strong>, is the amount a dynamic rope stretches with an 80kg attached to it. In general the elongation on single and twin ropes can't be more than 10% of total rope length and half ropes 12%</span></span></span></p> <p><span><span><span><span><strong>Dynamic elongation</strong> is the distance the rope stretches during the first UIAA fall and cannot exceed 40% of total rope length. </span></span></span></span></p> <h3></h3> </div> </div> <p>The choices are endless and difficult today so contact our <a href="/contact-us">Customer Service</a> or <a href="mailto:info@caspersclimbingshop.com">send us a mail</a> to help you choose the right product for your needs. </p> <p></p> <p>Shop online.........more time to climb.</p> <p></p> <p>Casper's Supports Your Summit</p> -
Helmets
<h1><strong><span style="text-decoration:underline;">How to Choose A Climbing Helmet?</span></strong></h1> <p>Wearing a climbing helmet is an important part of keeping yourself protected at the crag, wether your climbing or belaying. A helmet will protect you from rocks falling down on you, you falling down and hitting the rock or banging your head in the overhang. When getting a helmet there are three main things to consider, helmet type, type of climbing you do and getting the right fit. </p> <p><span>All helmets must meet industry standards for impact protection, with the standard for overhead protection being greater than the side-protection standard.</span></p> <h2><span style="text-decoration:underline;">Climbing Helmet Type</span></h2> <p><b>Hardshell Helmets </b>are durable and have an extra hard outer shell usually made of ABS plastic giving them a long lifespan compared to other helmets. They feature a thin foam layer inside and a strap suspension system and are therefor sometimes called hybrid helmets or suspension helmets.</p> <p><b>Shelled Foam Helmets </b>are lighter and <span>feature a thick layer of impact-absorbing polystyrene or polypropylene foam protected by a thin polycarbonate shell. This type of helmet has the advantage of being super light and having great ventilation. </span></p> <table width="409" style="height:210px;"> <tbody> <tr> <td></td> <td>hardshell helmet</td> <td>shelled foam helmet</td> </tr> <tr> <td>Mountaineering and multi-pitch trad climbing</td> <td style="text-align:center;"></td> <td style="text-align:center;">X</td> </tr> <tr> <td>Ice climbing</td> <td></td> <td style="text-align:center;">X</td> </tr> <tr> <td>Warm-weather sport climbing</td> <td></td> <td style="text-align:center;">X</td> </tr> <tr> <td>Cool-weather and single-pitch sport climbing</td> <td style="text-align:center;">X</td> <td style="text-align:center;">X</td> </tr> <tr> <td>Belaying</td> <td style="text-align:center;">X</td> <td></td> </tr> <tr> <td>Indoor climbing</td> <td style="text-align:center;">X</td> <td style="text-align:center;">X</td> </tr> </tbody> </table> <p></p> <h2><span style="text-decoration:underline;"><b>Climbing</b> <b>Helmet Fit</b></span></h2> <p>Even when friends or reviewers suggest that one helmet is the best, it won't be right for you if it doesn't fit correctly. The best way to assess fit is to try on different helmets in a climbing specialty store.</p> <ul> <li>Check for a secure fit</li> <li>Check and adjust chin straps</li> <li>Check the ease of adjustment</li> </ul> <h2><span style="text-decoration:underline;"><b>Climbing Helmet Lifespan</b></span></h2> <p>You should retire any helmet that’s dented, cracked or damaged—that includes the straps. You should even retire your helmet if you can't see any damage but had an incident where you thought to yourself, "I would have been seriously messed up if not for my helmet."</p> <p>Even if it’s never impacted, retire a helmet within 10 years. The sun’s UV rays slowly degrade materials, so if you climb frequently, cut this lifespan time in half.</p> <p></p> <p>The choices are endless and difficult today so contact our <a href="/contact-us">Customer Service</a> or <a href="mailto:info@caspersclimbingshop.com">send us a mail</a> to help you choose the right product for your needs. </p> <p></p> <p>Shop online.........more time to climb.</p> <p></p> <p>Casper's Supports Your Summit</p> -
Belay Devices
<h1><span style="text-decoration:underline;">How to choose the right belay device for you?</span></h1> <p>There are several different belay devices out there. We divided them up in 3 main categories, <em>tubular</em>, <em>figure eight </em>and <em>assisted breaking. </em></p> <p>These systems all work in a similar way, it is thanks to the friction between the device and the climbing rope that they are able to brake a fall.</p> <p></p> <h2><span style="text-decoration:underline;">Tubular belay devices</span></h2> <p>These are very versatile devices and hence are suited for any kind of climbing be it trad, sport or indoor. <a href="https://youtu.be/ymJb6tW5_BE" target="_blank" rel="noreferrer noopener">Operating them</a> is quiet simple, you just fold the rope, push it through and use a carabiner to either clip it to the belayer or the anchor. The friction caused between the bend rope and belay device helps slow down or stop the rope. Furthermore, when it is time to rappel, most tubular devices allow for a second strand of rope.</p> <table width="287" style="height:229px;"> <tbody> <tr> <td style="text-align:center;"><strong>pro</strong></td> <td style="text-align:center;"><strong>con</strong></td> </tr> <tr> <td>- light weight</td> <td>- some people (lightweight) find rappelling really slow</td> </tr> <tr> <td>- compatible with most ropes</td> <td></td> </tr> <tr> <td>- ropes don't twist or kink</td> <td></td> </tr> <tr> <td>- rappelling on two strands</td> <td></td> </tr> </tbody> </table> <p></p> <h2><span style="text-decoration:underline;">Figure 8 belay devices</span></h2> <p>This device is best suited for search and rescue, caving and rappelling. <span>Shaped like an 8, they have one larger and one smaller opening. When rappelling, you feed a bight of rope through the large hole and loop it around the outside of the small hole till it rests on the "neck" of the figure 8. The small hole is clipped to your belay loop on your harness. <span>For belaying, different ways to rig the rope through the device are recommended. Read the instructions included with your figure 8 to learn the proper way to set it up.</span></span></p> <table width="280" style="height:137px;"> <tbody> <tr> <td style="text-align:center;"><strong>pro</strong></td> <td style="text-align:center;"><strong>con</strong></td> </tr> <tr> <td>- great for rappelling</td> <td>- requires more force and attention from the belayer than other devices</td> </tr> <tr> <td>- eliminates heat caused from friction </td> <td>- twist the rope which can cause difficulty in the handling.</td> </tr> <tr> <td>- compatible with any rope diameter</td> <td></td> </tr> </tbody> </table> <h2></h2> <h2><span style="text-decoration:underline;">Assisted breaking belay devices</span></h2> <p>These, like the name suggests, are designed to lock down on the rope in case a sudden force is applied to them, thereby helping the belayer catch the fall. These devices are also<span> sometimes called self-braking, self-locking, auto-blocking or auto-locking devices and there are differences to be made. </span></p> <p><span>For example, some devices will provide assisted breaking <span>whether you’re belaying a lead climber, top-rope climber or a follower on a multipitch climb. Many of them<b> </b>use an internal camming mechanism to lock down on the rope when a climber falls. Compared to other devices they tend to be heavier and usually only work with a single line, which is why they are mainly used for sport climbing, either outdoors or indoors.</span></span></p> <p>Other devices that will only <span>assist braking for belaying one or two followers are usually tubular belay devices with an additional metal loop on the inside. This one is needed to attach the device to the anchor and set it up in assisted-braking mode. These devices have the same advantages/disadvantages than a normal tubular device while providing the possibility of belaying 1 or 2 followers in assisted braking mode. <span>As with any belay device, assisted-braking devices require that you always use proper belay technique and have your brake hand ready to lock off the rope</span></span></p> <table width="293" style="height:264px;"> <tbody> <tr> <td style="text-align:center;"><strong>pro</strong></td> <td style="text-align:center;"><strong>con</strong></td> </tr> <tr> <td>- help stop the climbers fall</td> <td>- <span>Don’t work with all diameters of rope</span></td> </tr> <tr> <td>- rope feed is smooth</td> <td>- heavy</td> </tr> <tr> <td>- <span>easy to lower the climber in a controlled manner</span></td> <td>- some only allow rappelling on a single strand</td> </tr> <tr> <td></td> <td>- <span>not recommended for use with wet or icy ropes</span></td> </tr> <tr> <td></td> <td></td> </tr> </tbody> </table> <p></p> <p></p> <p>The choices are endless and difficult today so contact our <a href="/contact-us">Customer Service</a> or <a href="mailto:info@caspersclimbingshop.com">send us a mail</a> to help you choose the right product for your needs. </p> <p></p> <p>Shop online.........more time to climb.</p> <p></p> <p>Casper's Supports Your Summit</p> -
Slings & Lanyards
<p><span style="text-decoration:underline;"><strong>Slings & Lanyards</strong></span></p> <p>Where to begin.. Lets get started by dividing them up and having a closer look at each category.</p> <p><strong>Slings</strong></p> <p>A sling can be used as a quickdraw extension, to make the rope run straighter and reduce friction on wandering routes, or it can be used to set up an anchor. Slings can also be used as carry tools, you can easily clip in all your draws so you don't lose them. Slings come in different sizes and lengths. They range from 30cm slings, great to carry material, all the way to 240cm slings, often used by people working in the trees.</p> <p><img src="https://www.caspersclimbingshop.com/img/cms/slings%20ocun.png" alt="" width="250" height="310" /></p> <p><strong>Quickdraw Slings</strong></p> <p>When talking about quickdraw slings, we still have to make the difference between two types of slings. </p> <p>First of all, like described above, slings can be used to extend and built your own alpine draw. To do so you usually use 8mm DYN slings. They are super light and can absorb huge forces.</p> <p><img src="https://www.caspersclimbingshop.com/img/cms/draw.png" alt="" width="250" height="250" /> </p> <p>Another form of quickdraw sling, is the shorter and stiffer version. These usually come in 3 sizes, around 11cm 17cm and 25cm depending on the brand. These are not as long nor as light as the previously mentioned slings, but they have the advantage that the climber can grab the sling much more comfortably. In case you are working a project for instance and you keep falling in the same spot, well pulling yourself back to your high point using slings is much more comfortable and easy here. </p> <p><img src="https://www.caspersclimbingshop.com/img/cms/sling.png" alt="" width="250" height="250" /></p> <p></p> <p><strong>Lanyards</strong></p> <p>Lanyards are useful to secure yourself to the belay anchor, adjusting your position, and to abseil. When you are climbing, especially big wall, a lanyard is a essential to have, it connects the harness to a safe anchor point. Lanyards are the most popular type of energy absorbers as they reduce the force in case of a fall. A lanyard energy absorber (via ferata) consists of several layers of tape that are sewn together on top of each other. If you fall, these layers stretched apart and absorb the shock by provide an extension.</p> <p><img src="https://www.caspersclimbingshop.com/img/cms/vertigo.png" alt="" width="250" height="250" /><img src="https://www.caspersclimbingshop.com/img/cms/lanyard.png" alt="" width="250" height="250" /></p> <p></p> <p>The choices are endless and difficult today so contact our <a href="/contact-us">Customer Service</a> or <a href="mailto:info@caspersclimbingshop.com">send us a mail</a> to help you choose the right product for your needs. </p> <p></p> <p>Shop online.........more time to climb.</p> <p></p> <p>Casper's Supports Your Summit</p> <p></p> -
Chalk & Chalkbags
<h1><span style="text-decoration:underline;"><strong>CHALK & Chalkbags</strong></span></h1> <p>Chalk is part of the basic climbing equipment, it dries off the athletes hands in order to have a safe grip on the next few moves. Especially during the summer, or just on warm days, chalk can make a huge difference. Holding on to slopers or tiny crimps in moist conditions can seem impossible..apply some of the magic powder to the hands and all of a sudden the hand just sticks to the rock. </p> <p><img src="https://caspersclimbingshop.com/img/cms/Magnesium_carbonate.png" alt="" width="261" height="125" /></p> <p>At it's core, chalk is chalk, how much could magnesium carbonate vary, after all its a molecule that is always the same.. For some reason the blends of chalk still vary, from super fine powdery chalk to more chunky parts that the athlete crushes with his fingers. Some chalk will last you for 10 moves, other chalk blends might just dry the hands for the next 5 moves. These are details that vary from athlete to athlete and from skin to skin. Chalk reacts differently on each skin type, depends on the outside temperature and probably many tiny factors that cannot always be taken in consideration. It is recommended to try out as many different brands as possible to find one that suits personal needs the best.</p> <p><img src="https://www.caspersclimbingshop.com/img/cms/frictionlabs.jpg" alt="" width="287" height="287" /></p> <p>Then there is also the option of choosing chalk balls or liquid chalk. Chalk balls are sth like "socks" filled with chalk, they prevent loose chalk falling out of your chalkbag and are generally good for kids to prevent a chalk mess in the bag or car. Liquid chalk is a paste, preventing any chalk particles escaping in the air. Some smaller gyms will only allow liquid chalk to keep the air clean and breathable. </p> <p><img src="https://caspersclimbingshop.com/img/cms/secretstuff.jpeg" alt="" width="178" height="178" /></p> <p>Chalk was not always part of climbing, in the very beginning it was considered cheating and harmful to the rock your climbing on, especially sandstone. Which is why there exist some climbing sites where chalking is not allowed. </p> <p>Chalkbags, whether for bouldering or sport climbing, are a climbers best friend. The difference between a climbers chalkbag and a boulderer's chalkbag is that the climber fixes his/her chalkbag around the waist in order to be able to chalk all the way along the route. A boulderer on the other hand does not need to carry the chalk bag into the problem, since they are generally climbing very short intense problems, and have a bigger chalkbag that can just stand on the ground by itself. </p> <p><img src="https://caspersclimbingshop.com/img/cms/moon-climbing-bouldering-chalk-bag-bf.jpeg" alt="" width="213" height="213" /><img src="https://caspersclimbingshop.com/img/cms/59N_300300.jpeg" alt="" width="159" height="159" /></p> <p>A climbers chalkbag should be light, small and handy to use. Easy and quick access is a must, hence the opening needs to be wide enough and is often reinforced to facilitate chalking.</p> <p>Finally, the design of both boulder an climber chalkbags offers a huge variety of choice. Most chaklbags come with brush holders, some come with a zipper to hold on to valuables or whatnots. The final choice one has to make when purchasing a chalkbag is a personal one, there are so many prints, patterns and colours available that the choice seems endless.</p> <p><br />The choices are endless and difficult today so contact our <a href="/contact-us">Customer Service</a> or <a href="mailto:info@caspersclimbingshop.com">send us a mail</a> to help you choose the right product for your needs. </p> <p>Shop online.........more time to climb.</p> <p></p> <p>Casper's Supports Your Summit</p> -
Climbing Accessories
<p>There are quiet a few accessories climbers use, mainly to keep their fingers and skin in top condition but also some gadgets that are meant to reduce/avoid pain and make their life easier. We will go into more detail in each category.</p> <p>The choices are endless and difficult today so contact our <a href="/contact-us">Customer Service</a> or <a href="mailto:info@caspersclimbingshop.com">send us a mail</a> to help you choose the right product for your needs. </p> <p></p> <p>Shop online.........more time to climb.</p> <p></p> <p>Casper's Supports Your Summit</p> -
Tactical Gear
<p>Any equipment related to police work, fire department, army and so on.</p> <p>In normal sports climbing these special tools are not necessary but can still a lot of times come in handy.</p> <p>If yo have any questions, get in touch with us, either via mail, phone or visit us in the shop.</p> -
Trad Climbing


